AdderLink iPEPS Config
Contents:
1. Introduction
2. T-Plan Robot Configuration
3. KVM System Configuration
1. Introduction
This document describes how to set up VNC connection between T-Plan Robot Enterprise and the AdderLink iPEPS KVM switch.
2. T-Plan Robot Configuration
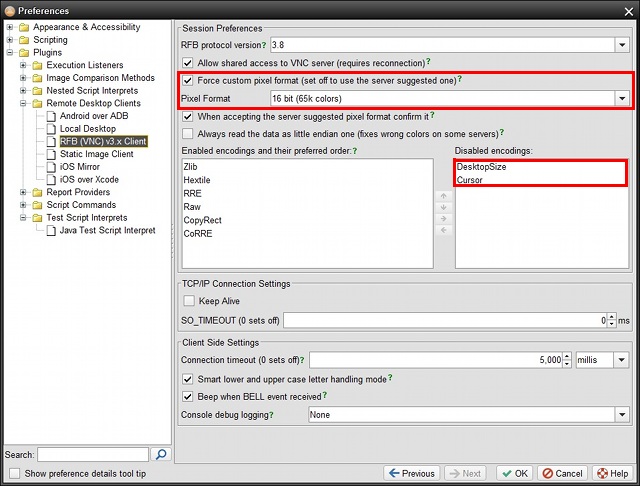
Open Preferences through the Edit->Preferences item in the T-Plan Robot Enterprise menu and select the RFB (VNC) 3.x Client panel:
- Set on the “Force custom pixel format (…)” option and choose either the 16-bit or 8-bit format. The default 24-bit format displays a blue cast.
- Remove (move to the right) the Cursor and DesktopSize encodings.
3. KVM System Configuration
The KVM runs a RealVNC server and may be connected from Robot using the “VNC Server” connection.
An often experienced issue is broken mouse synchronisation. You see two mouse pointers with a distance from each other and mouse actions (clicks, drags) are misplaced. This is a misconfiguration of the KVM system and not a T-Plan Robot issue. To fix it connect perform the following steps on the KVM system:
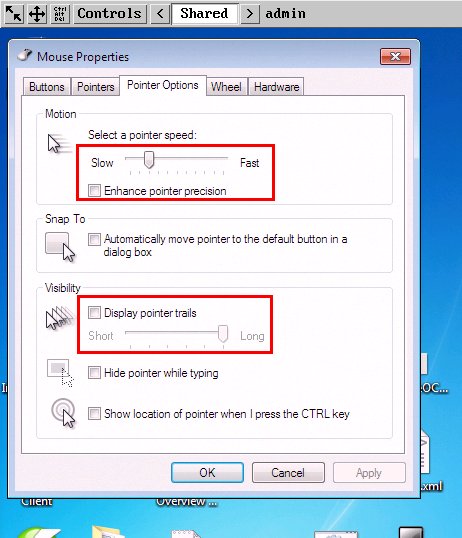
MS Windows
Open the Mouse Properties window from the system settings:
- Make sure that “Enhance pointer precision” and “Display pointer trails” options are OFF
- Set the mouse speed to a slower one
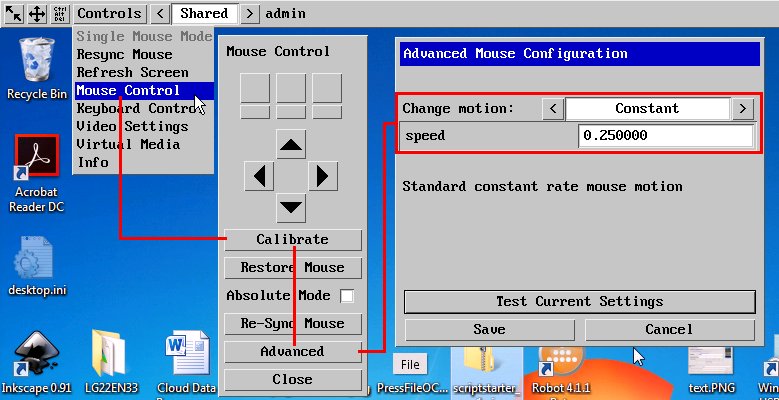
Once set re-calibrate the mouse using the KVM injected menu at the top of the screen:
- Select Controls->Mouse Control and click Calibrate. Follow the instructions.
- Select “Advanced” and verify that the “Change motion” option is set to “Constant”. The number below it is subject to the mouse speed selected in the system mouse settings and may be different for various environments. If you change the mouse speed you will have to re-calibrate.