git
Git
1. Overview
Robot v7.1 supports the Git version control system. The Robot's GUI lets you perform Git tasks directly from your project and code editor components. This document will guide you through the workflow.
Robot integration with Git is based on the JGit library. Since it is a pure Java implementation of the Git protocol you don't need to have any other binaries installed. You may however need another Git client occasionally because Robot supports only a subset of Git functionality.
Robot integrates JGit v5 to maintain backward compatibility with Java 8. The most recent JGit v6 has been tested too and it is compatible with Robot. The only drawback is that JGit 6 requires Java 11 or higher. If you need to use JGit 6 please follow the steps below. The procedure is applicable to any Robot release except for the Mac application ones:
- Download the JGit Core and JGit Apache SSHD Based SSH Support libraries of matching versions.
- Replace the
libs/org.eclipse.jgit*.jarandlibs/org.eclipse.jgit.ssh.apache*.jarlibraries in the Robot home folder with the ones you downloaded.
In case you need a Robot Mac app with JGit 6 please get in touch with our support.
2. Git Repository
A "Git repository" is a folder managed by Git. In our context it is a Robot project directory which has been put under Git control.
There are two ways to create a Git repository:
- Initializing a repository from an existing Robot project not under Git control.
- Cloning a repository from another Robot project which is already under Git control.
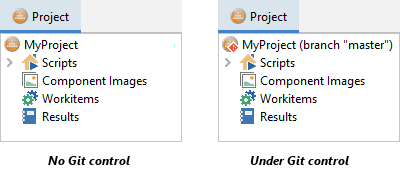
If you get a copy of a Robot project from someone else and you are not sure whether it is managed by Git then look at the appearance of the project tree root node:
2.1 Initializing a Repository
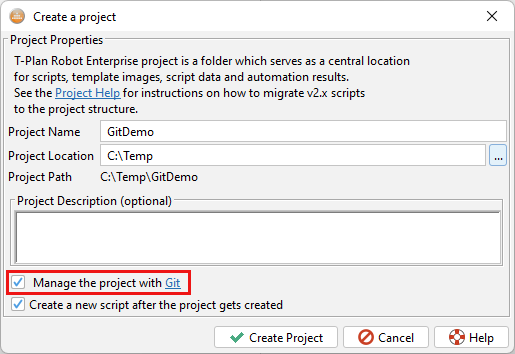
To initialize a Git repository for a newly created project select the check box at the bottom of the New Project window:
For an existing project select the Git→Initialize... menu item either in the main application menu or in the context one displayed on a right mouse click onto the project root node. If you are prompted for a directory stick to the project home folder to enable the full Git support functionality.
Once completed Robot will ask you whether to update the Git repository to ignore temporary files. These typically include execution outputs such as reports, Image Doctor records, compiled Java classes and back up files. Robot also prefers to ignore the project descriptor tprproject.xml because it gets updated with every session.
If you choose "Not Now" or "Skip" you may update the ignore files later using the "Configure Git to ignore Robot temporary files" check box in the project Properties window. You may also edit the ignore rules manually through the Git→Manage Ignore Rules action.
2.2 Cloning a Repository
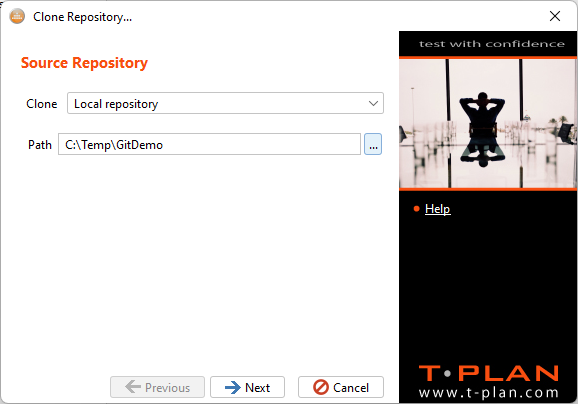
To clone an existing repository select Git→Clone Repository... from the main menu. The first screen allows you to select where to clone from. The window defaults to cloning a local repository. For example, to clone the GitDemo project initialized in the previous chapter select its home folder:
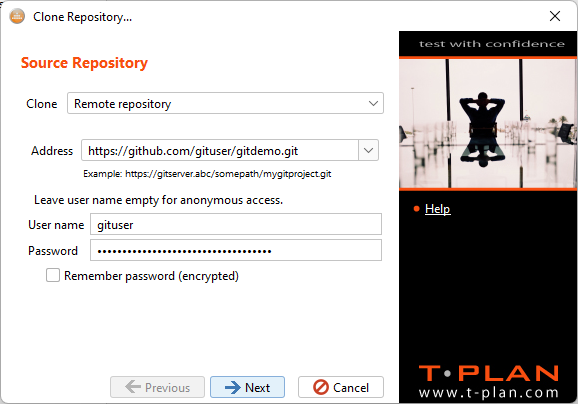
To clone a remote repository select the "Remote repository" option and provide the repository address and credentials:
Robot supports the following protocols:
- HTTP
- HTTPS
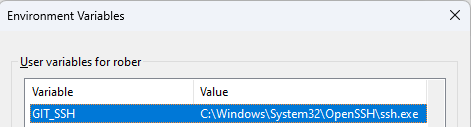
- SSH is supported indirectly. To enable it you must install the ssh binary (it is for example part of OpenSSH client) and create a system variable GIT_SSH pointing to the binary prior to starting Robot. An example on MS Windows:
GitHub Specifics:
GitHub projects can be configured to provide HTTP access for read-only access or HTTPS or SSH for full control of the repository. Since August 13, 2021, GitHub does not support authentication via HTTPS with your GitHub account password for security reasons anymore. You may however generate a Personal Access Token and use it instead of the password. The "Remote Repository" screenshot above shows an example of such an access. For details on HTTPS and SSH access to GitHub see this StackOverflow post.
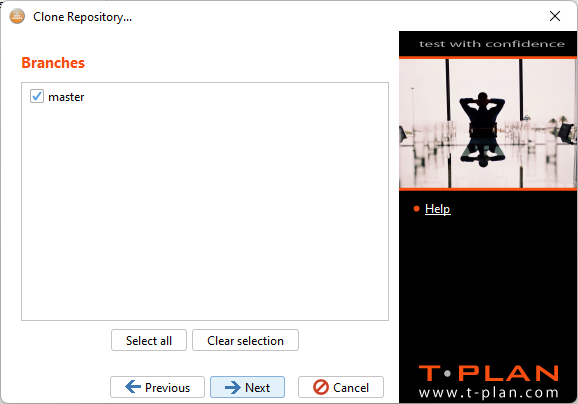
After you specify the source repository and click Next you have to select the branches to be cloned:
The final screen allows you select the target path and folder name to clone the repository to. You may also select a name for the original repository being cloned ("Remote name"). The default name is origin. It is recommended to keep it because most documentation and examples use it:

To clone the repository click Finish.
3. Git Actions
Git related actions are available through the Git menu group. We will refer to it in this text as "Git menu". It is available from several locations:
- The "Git" group in the top application menu,
- The context (right click) menu of a project tree node,
- The top ribbon bar (tool bar) also provides access to selected actions which are subject to the project tree selection.
All these three menus apply the selected Git action to the file or files selected in the project tree. There are a few exceptions which are not file specific such as Clone or Manage Ignore Rules. These are always available.

The Git menu is also available in the context menu displaying on a right mouse click onto the script editor tab (the one at the top with the file name). File specific actions in this menu are applied to the editor file only.

4. Working with Files
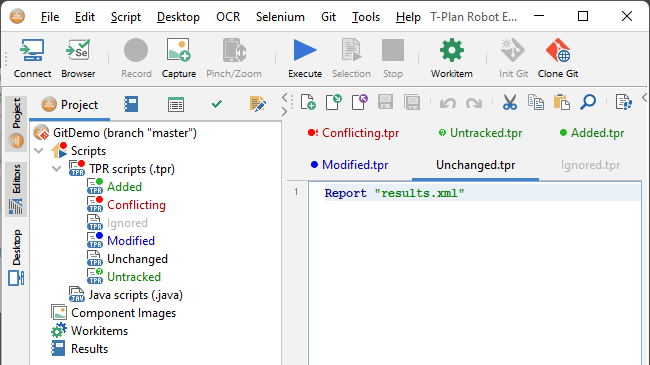
When you create a new file (a script, workitem or component image) it will appear with a green question mark badge in the project tree. This indicates that the file is not yet tracked by Git.

To add the file or files to the index (staging area) select the Add item from the Git menu. The badge will change to solid green to indicate that the file has been added (it is being tracked) but it has never been committed.

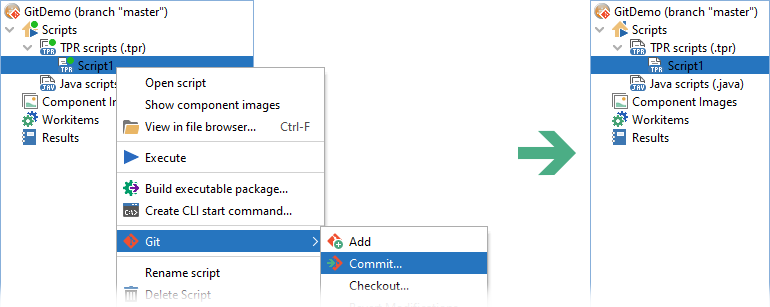
To commit the file or files select the Commit item. Note that Git technically requires you to Add the file before commit but Robot will do it for you if necessary. Once committed the badge will go away. The tree node will appear with the default color and icon because there are no changes to the file.
If you edit the script and save the changes it gets a blue badge. This indicates that the file has been modified end is eligible for another commit.
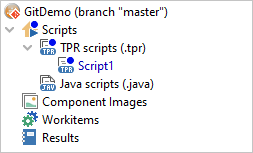
There are two more states a file can be in:
- Conflicting files have a red badge. These are typically results of file merging.
- Ignored files are files that are made ignored by Git by an entry in the
.gitignorefile. You may set a file ignored by selecting the Ignore item in the Git menu. It is also possible to edit the file manually through the "Manage Ignore Rules" item. Ignored files have no badge but the text is in gray.
Here's an example screenshot showing all possible file states: