screenshot
Screenshot Window
This window allows you to create a Screenshot command easily via GUI and insert it into the active editor. If the window is opened while the caret is on an already existing Screenshot command in the active editor, it allows to edit the command. See the Screenshot command specification for more information on fields and values defined in the window. To open the window either select Script -> Screenshot Command or click on the corresponding toolbar button in the main GUI menu. To edit an existing command perform a right mouse click on the command in the editor and select Properties in the context popup menu.
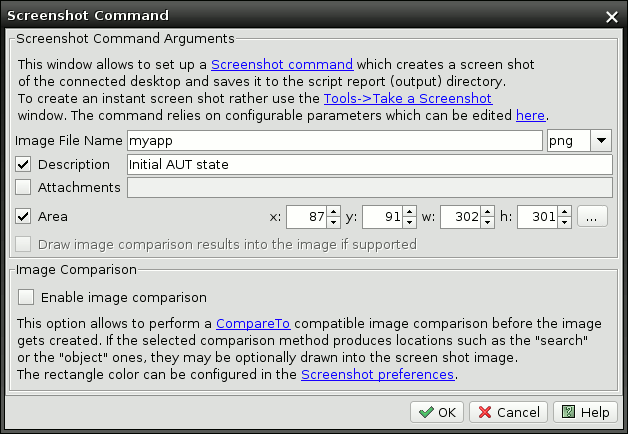 The only mandatory field is the screenshot image file name. The field should be populated just with the file name without extension which is appended automatically based on the format selected in the drop down. Available image formats depend on the local Java version. Java 6 supports by default BMP, GIF, JPEG, JPG, PNG and WBMP formats. Additional formats may be supported through installation of imaging libraries such as JAI (Java Advanced Imaging). To find out which image formats are supported by your particular environment open the Help->About window, select the System Information tab and review content of the Supported Image Formats field.
It is recommended to save screenshots in a non-lossy image format (such as PNG) where image comparison is employed. It makes it possible to debug eventual image comparison failures against the screenshot image through the Static Image Client later and eventually reuse the image for creation of a new or additional template image. This is not possible with lossy formats (such as JPG) which change image pixel values in their compression algorithms.
Other parameters listed in the Screenshot Command Arguments panel are aligned with the Screenshot command specification.
The Description is saved as a parameter into the script. It is not saved to the image file. It is typically picked up by report providers and displayed in the report next to the screenshot.
The Attachments field allows you to specify a semicolon separated list of attachments. This field is only used by HTML reports. It is inteded to tell the report providers that the screenshot is associated with some files which have been copied (or will be) by the script to the output folder. Report providers typically use this information to build a list of HTTP links next to the screenshot in the report. Be aware that this command doesn't physically copy or move the attached files to the output folder and neither the window nor the command checks whether the files specified in the argument exist in there. The links in the report will be broken unless your script physically copies the attachments to the output folder, for example using Exec (copying of files within the local OS or from a shared network drive) or through a file transfer mechanism employed on the remote desktop (FTP, ...).
The Area field allows to specify a rectangular area to be cropped from the desktop image. The button on the right opens a simple window with the current remote desktop image where you can comfortably define the screenshot area using mouse drags.
The Draw image comparison results... check box controls whether results of image comparison should be painted into the captured screen shot. The default value is false (meaning "do not paint any results").
If the command doesn't employ image comparison or the specified comparison method doesn't support result painting the parameter is ignored.
Result drawing is currently supported by the search2, search, object and text comparison methods. The color used for drawing defaults to red and can be customized in the command preferences.
The Screenshot command also supports image comparison. The goal is to support tasks such as "take a screenshot and also verify the desktop image". Image comparison results generated by Screenshot commands are in addition displayed by the default HTML/XML report. This functionality is not available for CompareTo and WaitFor commands.
The comparison parameters appear after the Enable image comparison check box is set on. Image comparison parameters can be specified in the Template Parameters component which is described in details in the CompareTo Command Window help topic.