Release Notes
Contents:
1. Client System Requirements
Robot can automate the "Local Desktop" which means no additional requirements beyond those to install and run Robot below.
Robot can also run in a client-server scenario where the client system executes Robot which automates the server system through one of the supported remote desktop technologies (such as RFB/VNC). As the client and server systems may be two fundamentally different platforms, we list the client and server system requirements separately.
These are the requirements for the client system running Robot:
Item | Minimum | Recommended |
|---|---|---|
Processor (CPU) | Not set1 | 2GHz+ |
Memory (RAM) | 1GB | 2GB+ |
Free Disk Space | Standalone cross platform release: 200MB for Robot alone plus approx. 200MB for the Java JRE/JDK installation. OS specific releases: 300-750 MB. Robot Project size varies based on content. | 1GB+ |
Operating System | Any Windows/Mac/Linux system supported by Java 9+ or compatible. Java 9 supported systems (Robot 7 or lower) | 64-bit OS preferred for memory intensive2 deployments. |
Web Browser | Any web browser supporting XML, XSLT and XPath | MS Edge, Firefox, Chrome or Safari latest releases. |
Installed Software | Robot has modular architecture with a number of optional features requiring to install additional components:
|
1 Slower processors will result in slow performance of graphical operations, such as image comparison or OCR.
2 The overall memory requirements depend on the desktop size, the nature of graphical operations performed by the script and the number of parallel automated processes where the suite is designed as a multithreaded one.
2. Server System Requirements
Server system requirements depend on the connection type (protocol) selected for the System being automated.
Robot by default supports these connections:
Connection Type | Description |
Testing over the RFB (VNC) 3.3, 3.7 or 3.8 protocol. | |
Testing of image files or systems with image file output. | |
Testing of Android devices connected through the USB cable over the Android Debug Bridge (ADB) tool. | |
Testing of applications and system components displayed on the local desktop. | |
Testing of iOS devices using a combination of AirPlay screen mirroring and the T-Plan or VNC server. | |
Testing of iOS 9+ devices from Mac OS X with Xcode installed. | |
Testing over the RDP protocol. |
3. Installation
Robot is being delivered in two basic formats:
Standalone Cross Platform Release
It is a plain ZIP file containing the core Robot functionality in form of platform independent resources (compiled Java code):
- It can be used for all Java compatible platforms with compatible Java installed including Windows and Mac OS.
- There's no installer. All you have to do is to unzip the file into a folder on your hard drive and run it using the provided scripts.
- Installation of additional components is required to enable optional features.
- Specifics of the standalone release are described in a separate document.
The standalone release is typically used to plug in Robot into 3rd party Java frameworks (see Integrations) or to operate on exotic or minor operating systems (Solaris OS, custom Linux distros, Unix flavors such as IBM AIX etc.). It can be also used for space limited deployments or where a custom set of features is required.
Due to its modular nature the release is not digitally signed. Note that some systems may limit its functionality. For example, recent versions of Mac OS will not deny access to certain user folders to unsigned applications. Stick to the OS specific release to avoid this.
OS Specific Releases
OS specific releases target individual operating systems and are a recommended way of installing the product. They typically package Java and other components to provide a ready to use solution without additional efforts. They are also digitally signed to meet security requirements applied by the OS.
| Platform | Formats | Components | Description |
|---|---|---|---|
| MS Windows | Robot 8+ for MS Windows | Installer Java 21 LTS Chromium 127 Tesseract 5.3.2 Android Platform Tools 35.0.2 | Release for 64-bit MS Windows systems in form of an EXE application. |
| Robot 7 for MS Windows | Installer | ||
| Mac OS X | Robot 8 for Mac OS X for Intel CPU Robot 8 for Mac OS X for ARM (M1) CPU | Java 21 LTS Chromium 127 Android Platform Tools 35.0.2 WebDriverAgent 13 | Release packaged as a native Mac OS X application (.app). |
Robot 7 for Mac OS X for Intel CPU | Java 17 LTS Chromium 116 | ||
| Linux | Robot 8+ for Linux (RedHat package) Robot 8+ for Linux (Debian package) | Java 21 LTS Chromium 127 Android Platform Tools 35.0.2 | Release for Linux available in the RPM and DEB formats. |
4. License
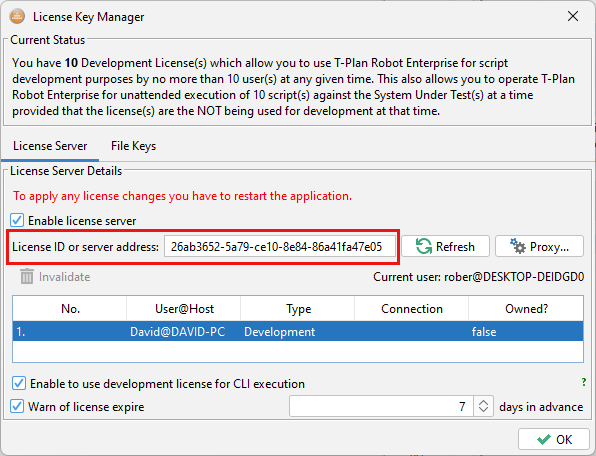
Robot requires a valid license to run. You typically receive a license ID (for example "196ba7d1-5a03-481a-8e84-86a77fa47e05", supported since 7.2.9) or the full License Server URL (for example "https://myserver.mydomain/licserver?lid=196ba7d1-5a03-481a-8n84-86a77fk47e05") from the T-Plan support or one of our partners.
There are a number of ways to pass it to Robot:
- The simplest is to copy the license URL/ID to the clipboard before launching Robot. It should then be automatically applied on startup.
- Through the Tools->License Key Manager window in the GUI. It will pop up on your first Robot start. This will store the server identification under the ls.address key to the user configuration file for permanent use.
- Another possibility is to specify the license through the --licenseserver CLI option.
- Solutions integrating Robot into 3rd party Java frameworks and/or applications may specify the license key path or a list of semicolon separated paths through the robot.licenseServer system property. It must be done before the ApplicationSupport class gets instantiated. This option is available since v4.4.
Example:
System.setProperty("robot.licenseServer", "mymachine:8880");...ApplicationSupport robot = new ApplicationSupport();
5. Upgrade and Migration
To upgrade Robot for Windows first uninstall the T-Plan Robot application and then install it anew.
To upgrade Robot for Mac simply replace the T-Plan Robot application in Applications.
On Linux use the appropriate package manager command to upgrade or reinstall the 'tplanrobot' package.
The standalone cross platform release may be simply rewritten (replaced) with a new one. See the Standalone Release Overview document for additional details.
6. Uninstallation
If you installed Robot through the Windows installer, you may uninstall it through the standard Windows software manager.
If you installed Robot for Mac then simply delete the application.
On Linux systems use the appropriate command to remove the 'tplanrobot' package.
To uninstall Robot installed from the ZIP simply file delete the files unzipped during installation. You may also delete the user configuration files, found within your <user>/.tplanrobot or user 'home' directory. The tool doesn't create any other files or registry entries except automation outputs such as screenshots, template images and automated reports.
Robot Project files may be stored in any user defined location and can be identified by the presence of the "tprproject.xml" file at the root directory.
7. Startup
To start Robot:
MS Windows:
- If you installed Robot using the Windows Installer start T-Plan Robot from the Windows Start menu.
- If you are using the cross-platform build (unzip & run) switch to the install folder and run the robot.bat file.
Mac OS X:
- If you installed the Robot Mac app (.dmg) then start the TPlanRobot application from the Mac OS X Applications.
- If you are using the cross-platform build (unzip & run) switch to the install folder and run the robot.sh file.
Linux/Unix:
- If you installed the Linux package then start the T-Plan Robot file from the Applications screen.
- Switch to the cross-platform build folder and run the robot.sh file.
There are two modes:
- GUI Mode - Displays the graphical interface in your window system (MS Windows, X-Windows). This is the default mode when you start Robot without any CLI options.
- CLI Mode - No GUI is displayed. Robot starts in this mode only when invoked with the n or --nodisplay option. Use this way for automated execution of scripts. Other parameters like -r/-run must be supplied.
See the CLI Options Specification document available in the Robot Help or online.
Once the GUI is up and running, open Help for instructions on how to use Robot. There should be a complete documentation set included. All the documents/document collections are also available online.