Robot Quick Start


Introduction

(Est duration : 30 Minutes)

Welcome to this introduction to T-Plan Robot. Here you will find key things you need to know to get you up and running with your first automation project, from installation to execution.


Firstly, following on from any demo you may have seen, it is important to set some realistic and achievable goals for your initial short trial period.

Key goals should be along the lines of:

  • Understand the basic principles of how T-Plan Robot automates any system
  • Be able to create a script containing simple automated actions from scratch
  • Successfully execute an automated script against a sample application
  • Understand the output reports and basic error handling

With this knowledge and understanding you should then be in a good position to make an informed decision as to whether or not T-Plan Robot is the right tool for you.


Architecture

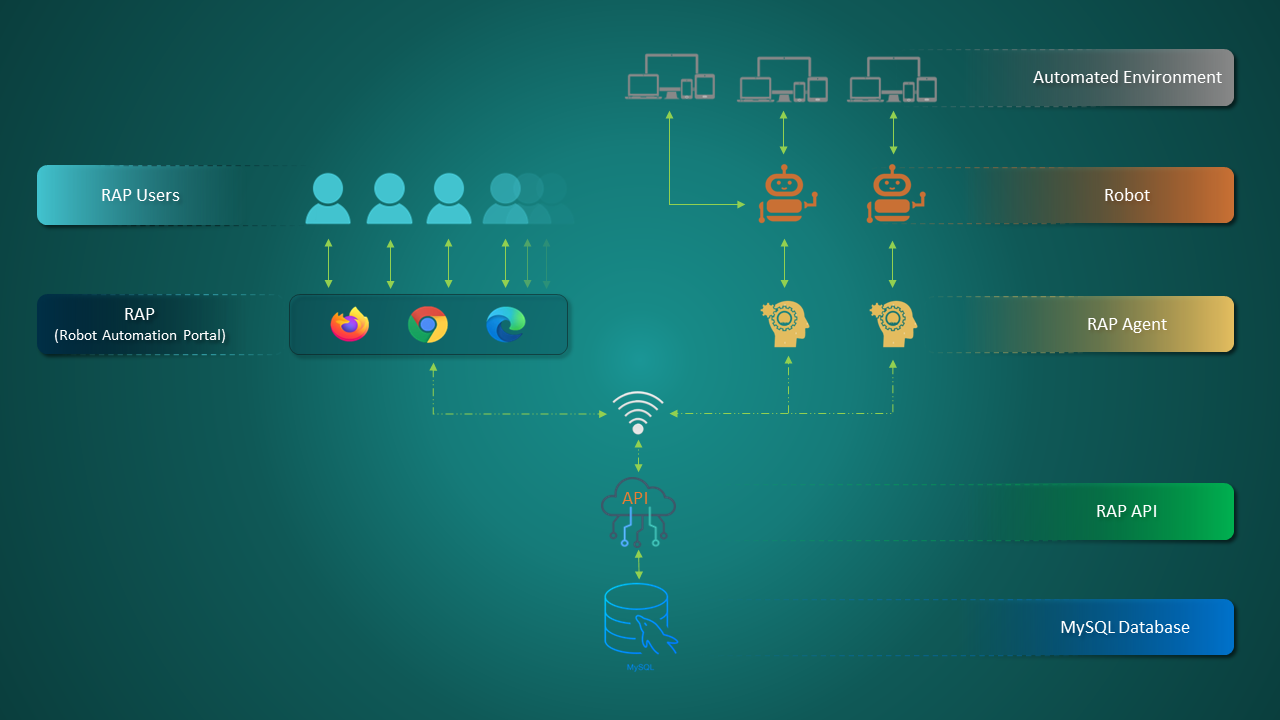
T-Plan Robot is the automation engine that sits within a desktop environment in order to create and execute your scripts, and this is what this guide focuses on. However, it is good to understand the bigger picture and just to know that T-Plan also offers the "T-Plan RAP" which provides the ability to manage, orchestrate and report on Robot executions across many different environments from a central web application.


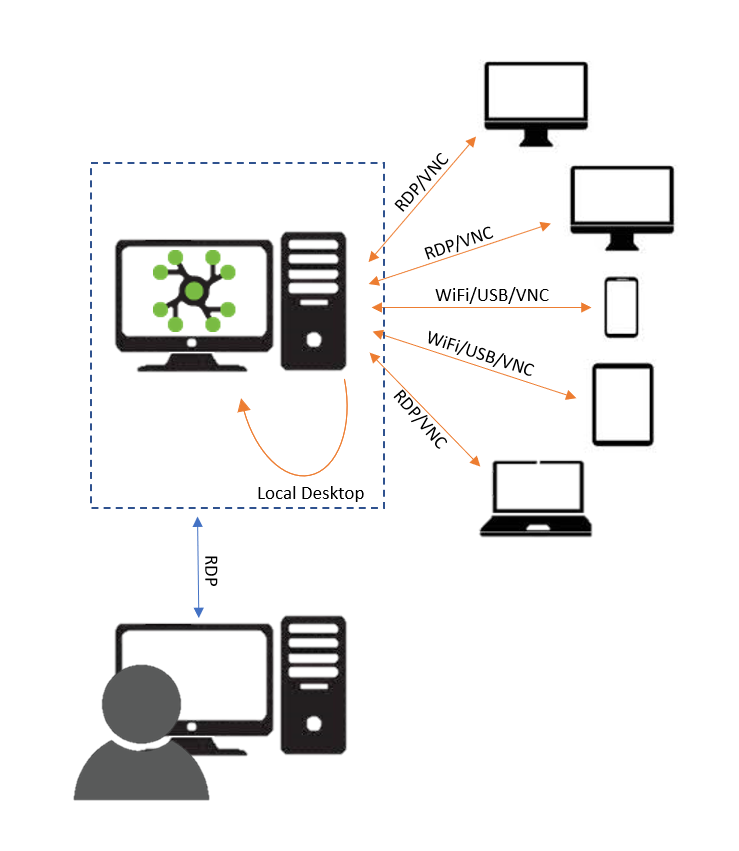
With regards to Robot itself, it is a Java desktop application which connects to the target SUA (System Under Automation) using one of a number of available methods.


Please watch our 2 minute introduction video on how to install and run Robot for the first time. This covers steps 1 & 2 detailed below.


Step 1 - Installation


Java

Java must be installed before installing T-Plan Robot. This guide does not cover installation of Java, but all main distros are supported from Java 9+.

  1. Download either the standalone ZIP archive or the appropriate installer package
  2. Install:
    1. If using the cross-platform ZIP archive, simply extract it to a location of your choice
    2. If using the .exe or .dmg double click it to launch the native install wizard and complete as instructed.
  3. Run
    1. If using the ZIP archive, launch Robot by double clicking the robot.bat or robot.sh
    2. If using Windows Installer, open the Windows Start menu and select T-Plan Robot
    3. If using MacOS, open the Applications list and select T-Plan Robot (on first launch you will need to add Robot to the security exceptions as instructed)

That's it!

T-Plan Robot is a file based application which means that you do not need to setup any server-side components such as databases or web services etc.


Step 2 - Setup

Prior to launching Robot for the first time please copy your license code to the clipboard. This will have been provided within your welcome email.


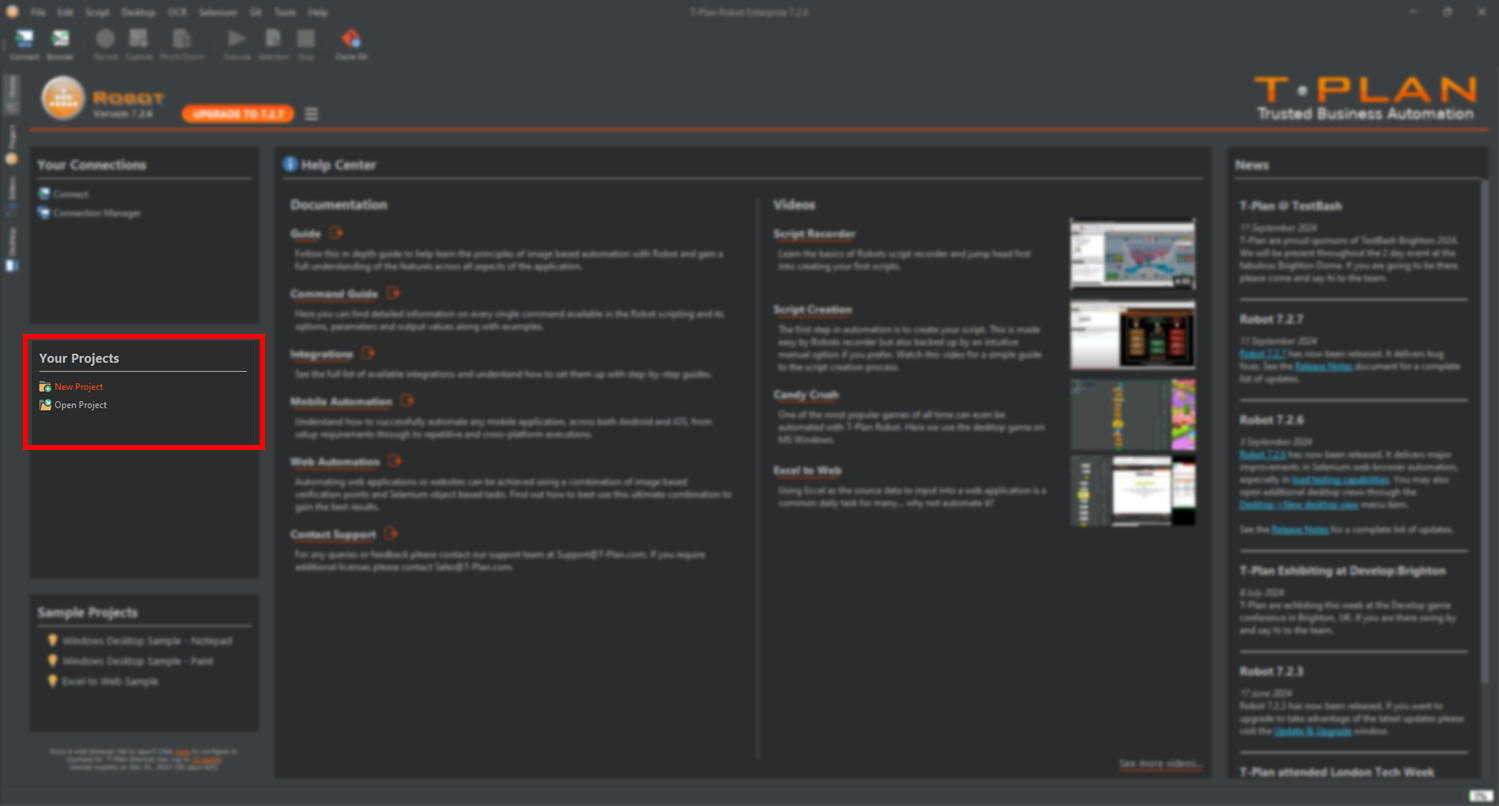
From the Robot Homepage select "New Project"

Why not try one of the provided Sample Projects instead. Simply select the desired sample from the section in the bottom left of the Home page to download and open it.


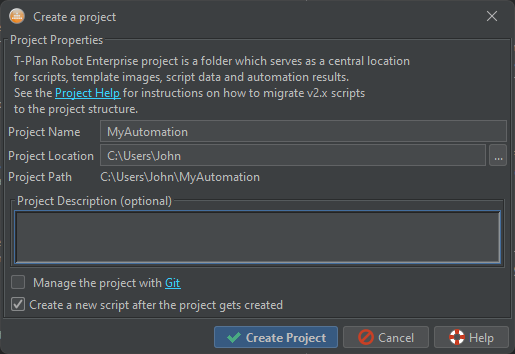
Enter your desired project name and location and select Create Project


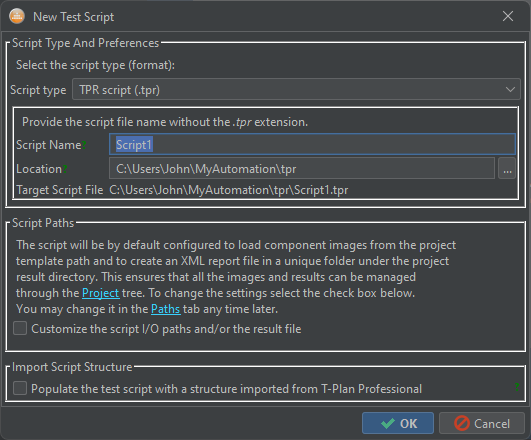
Next you will be prompted to create your first Script within your new Project


Finally, you will be asked your preference on how you wish to work within Robot. During your trial we recommend that you set the following:

  • Layout type - I prefer to develop with both code and visual
  • Show the script tree view


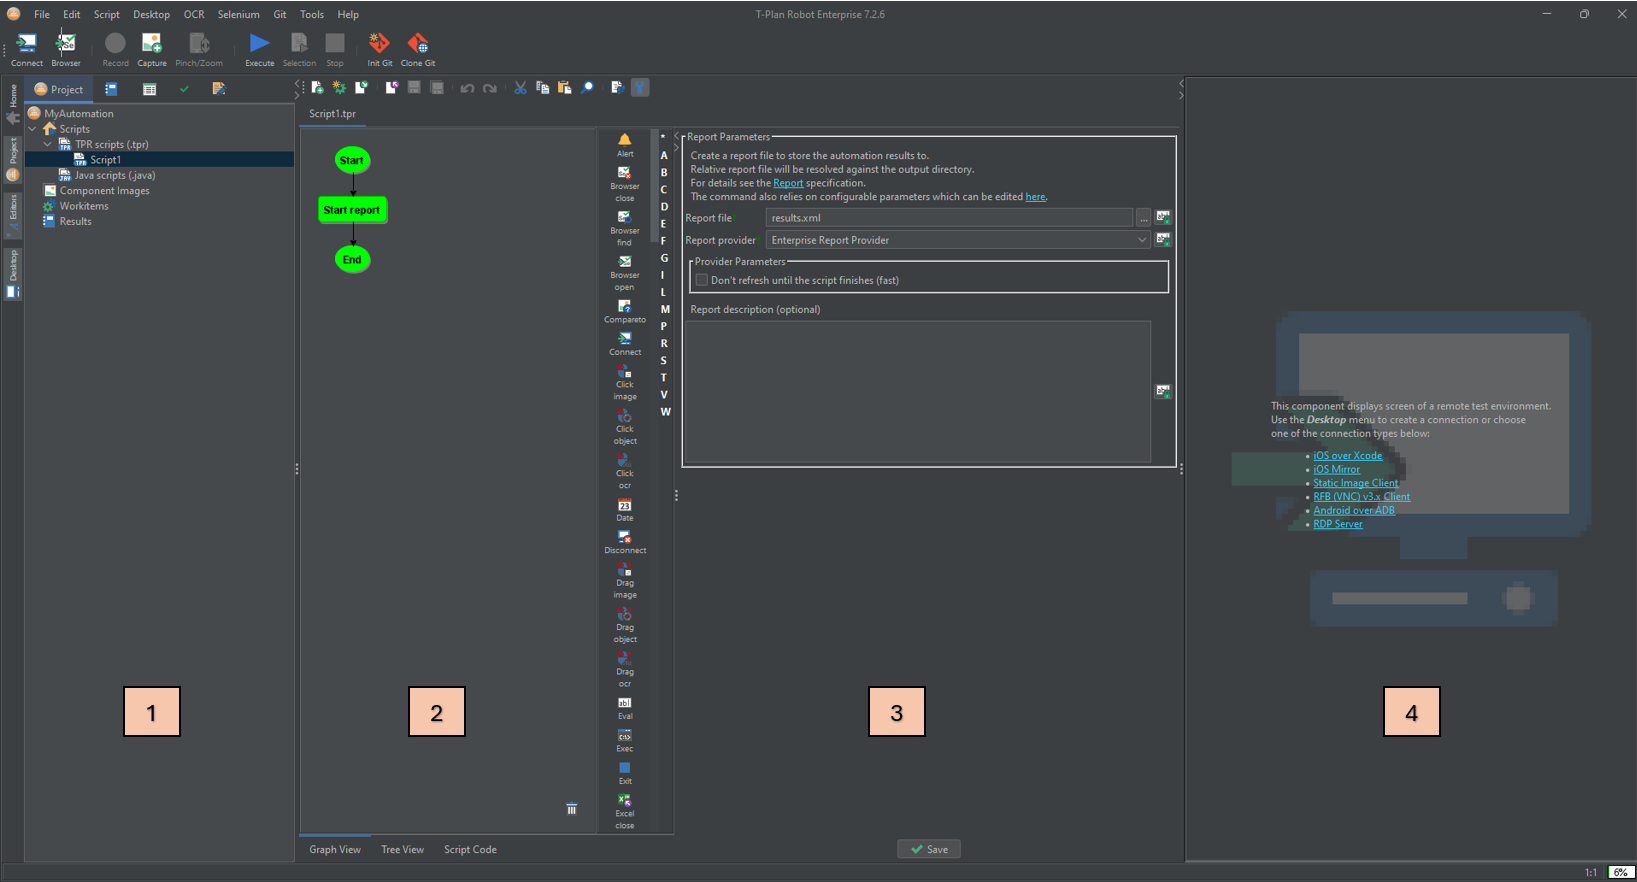
Once the options have been set you will be presented with the main Robot UI. The 4 main sections are:

  1. Project panel
  2. Script Editor
  3. Command properties panel
  4. SUA Desktop Viewer


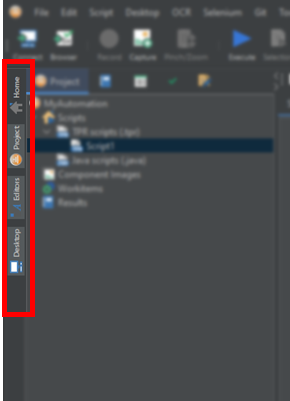
Maximize your workspace by quickly hiding/showing each of the panels using the quick access bar on the left side. They can also be resized using the handles () found on the divider bars.


The following 2 minute video shows the actions described in steps 3-5 below to create your first simple script:

Step 3 - Create Your First Script

The quickest way to get up and running with an automated script is to use the recorder. This section will walk you through the steps to generate your first script.


If you prefer to download our sample project to see the intended end result please download it from here: Windows Calculator Sample

» Connect

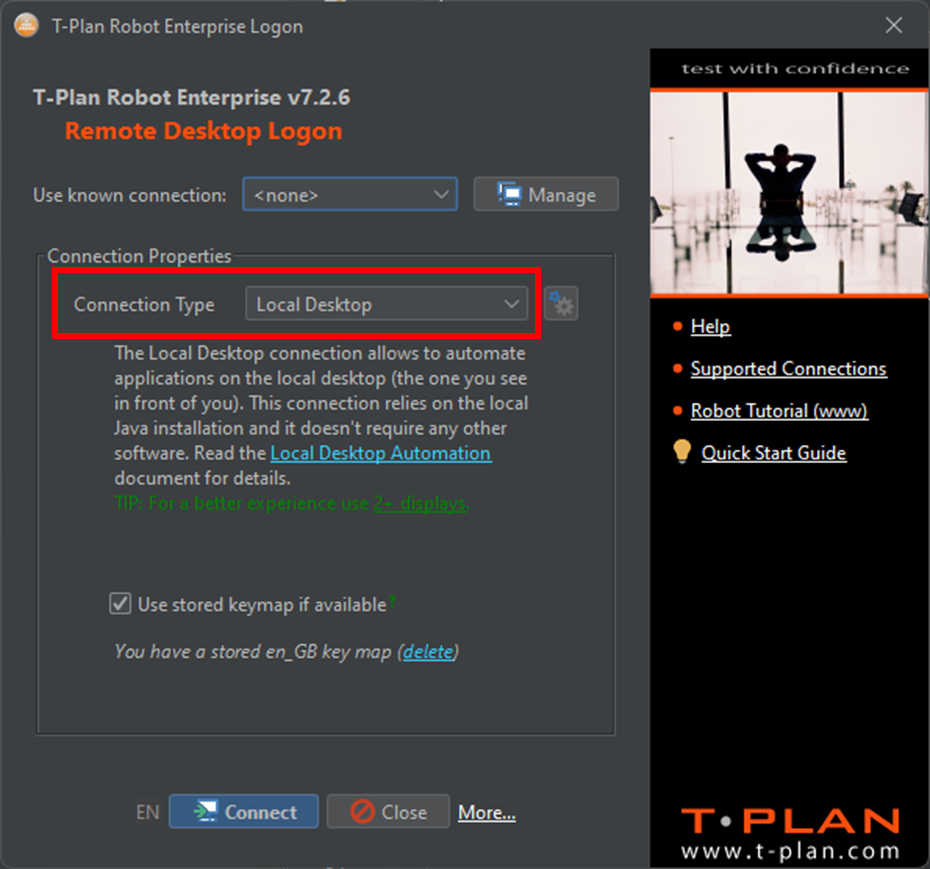
Many features in Robot are only available after connecting to your target SUA and the Recorder is one of those. Select Connect from the ribbon bar.

From the Connect dialog, select "Local Desktop" as the Connection Type:


» Record

Top tips to ensure a successful recording are:

  • Before recording close applications/windows such that you can begin from a 'clean' baseline
  • Perform mouse actions in a steady and consistent manor
  • Remember that both mouse and keyboard actions are recorded
  • Image templates generated by a mouse click are captured from the screen a few milliseconds before the click was applied so consider the speed at which you click the element having moved to it 

Next select "Record"  from the toolbar.

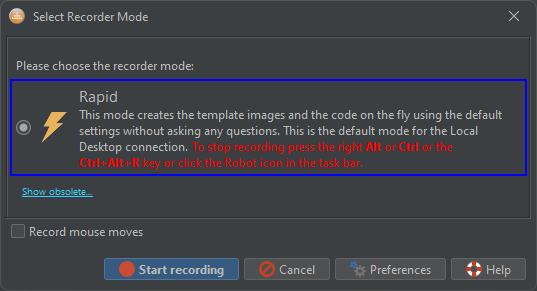
Because you are connected to the Local Desktop, the only recorder mode available is "Rapid". This simply means that Robot will not interrupt you during the recording but will instead provide a review option post recording.

Before progressing, make a note of the options for ending the recording. Typically this would be right Ctrl.


For your first script we recommend choosing a very simple scenario. We also recommend to use a mixture of mouse and keyboard actions. For example:

  1. Launch Calculator app
    1. Press Windows
    2. Type Calculator
    3. Press Enter
  2. Preform an equation
    1. Click any number
    2. Click any operator (plus, or multiply)
    3. Click any number
    4. Press Enter
  3. Verify Result
    1. Click the result value
  4. Close Calculator app
    1. Click the close icon
  5. End Recording
    1. Press the hotkey noted earlier to end the recording (e.g. Right Ctrl)


For more details on how to use the Recorder and its various options, please see this help page: Rapid Recorder Mode.


» Review/Edit

On completion of the recording, you will be presented with the Recorder History window allowing you the chance to review exactly what the recorder has generated based on your performed actions.

You will notice that only Mouse (Click/Drag/Scroll) actions are listed here, as they are the actions based on image template recognition.

Select each Click action listed in the tree to display the snapshot thumbnail below. The highlighted section is the image template that will be used by Robot moving forward.

To amend the highlighted template area, simply double click the thumbnail to open a full screenshot that was captured shortly before the click was performed. Here reselect the desired area to recreate the new template.

Best practise - Image templates do not necessarily need to make sense to the human eye, however they should be as small as possible while remaining unique. For more information on this, see this topic: Understanding Image Templates


The result of your recorded actions should produce a script similar to that below, 

Report results.xml

Press Windows+D
Press Windows
Typeline Calculator
Click image template="comp1001-1"
Click image template="comp1001-2"
Click image template="comp1001-3"
Press Enter
Screenshot sum.png
Press Alt+f4
Report results.xml

Press Command+F3
Press Command+Space
Typeline Calculator
Click image template="comp1001-1"
Click image template="comp1001-2"
Click image template="comp1001-3"
Press Enter
Screenshot sum.png
Press Command+Q


Step 4 - Execution

Using the options in the ribbon bar, you can execute the entire active script, or only the highlighted section.

Do not touch mouse or keyboard during execution

When connected to the Local Desktop, selecting Execute or Execute Selection will again make Robot minimize as to not interfere with the execution.

If you move your mouse or press any keys during execution, it will pause and return to the Robot UI.

It is advised to let Robot handle failures such that they can be reported/addressed appropriately.


Step 5 - Reporting

The execution will halt when either:

  • a search command fails to find a match - this will pause execution and display the "Image Doctor" for you to review and rectify the problem on the fly and resume execution

or

  • the script 'completes' its execution and comes to a natural end

Once complete, the "Result Manager" window will appear allowing you to see the status and access the output report.

Selecting "View" here will open the output report.


During execution, you will also see the Project panel switches to the Execution Log tab which gives a summary of the execution, including any issues that were encountered.

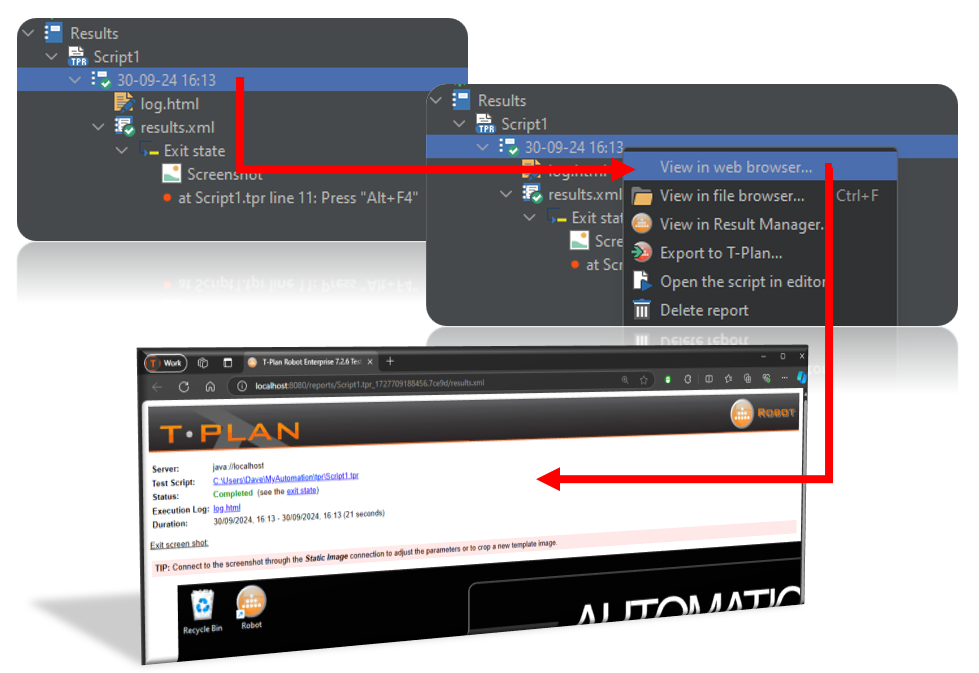
Reverting back to the "Project" tab allows you to expand the tree to view all previous execution Results. Here you can right click on any entry at any time and select "View in web browser" to view the report.


Next Steps

Having completed this basic introduction you can now progress on to exploring other features available within T-Plan Robot, such as:

Finally, feel free to review the full user guide to cover the full range of features: Robot Quick Start

With knowledge of all of the above elements, you will be able to successfully create an automation suite for any application, of any type, on any platform.

If you continue to have any questions or issues please contact your support/sales representative.